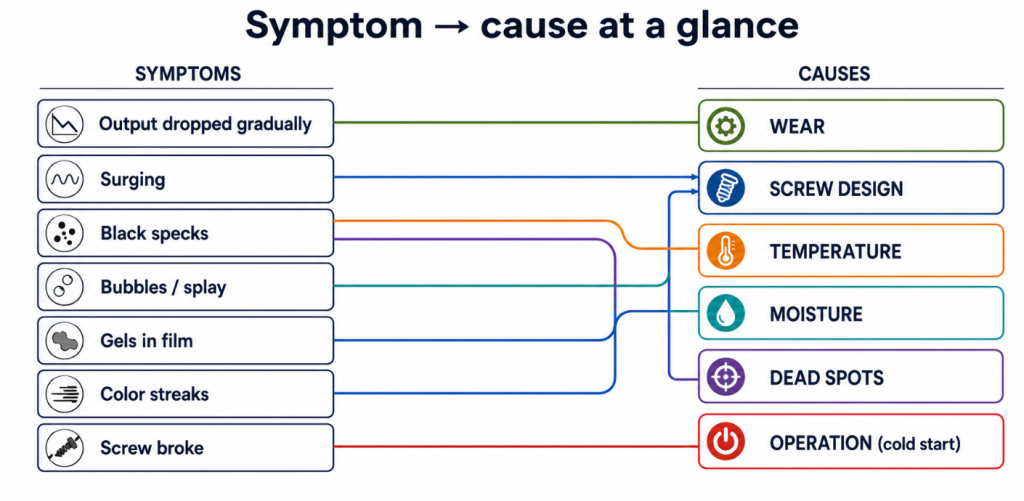
Use this page as a triage table: find your symptom, see the likely causes ranked by how often they’re actually the culprit, and jump to the detailed fix. Most extrusion problems trace back to one of five root categories — screw/barrel wear, screw design mismatch, temperature control, material and moisture, or contamination and dead spots — and knowing which category a symptom belongs to eliminates most of the guesswork. Below, each common symptom is mapped to its causes and to the guide that solves it.
By the BLOOM Engineering Team
Start Here: The Five Root Categories
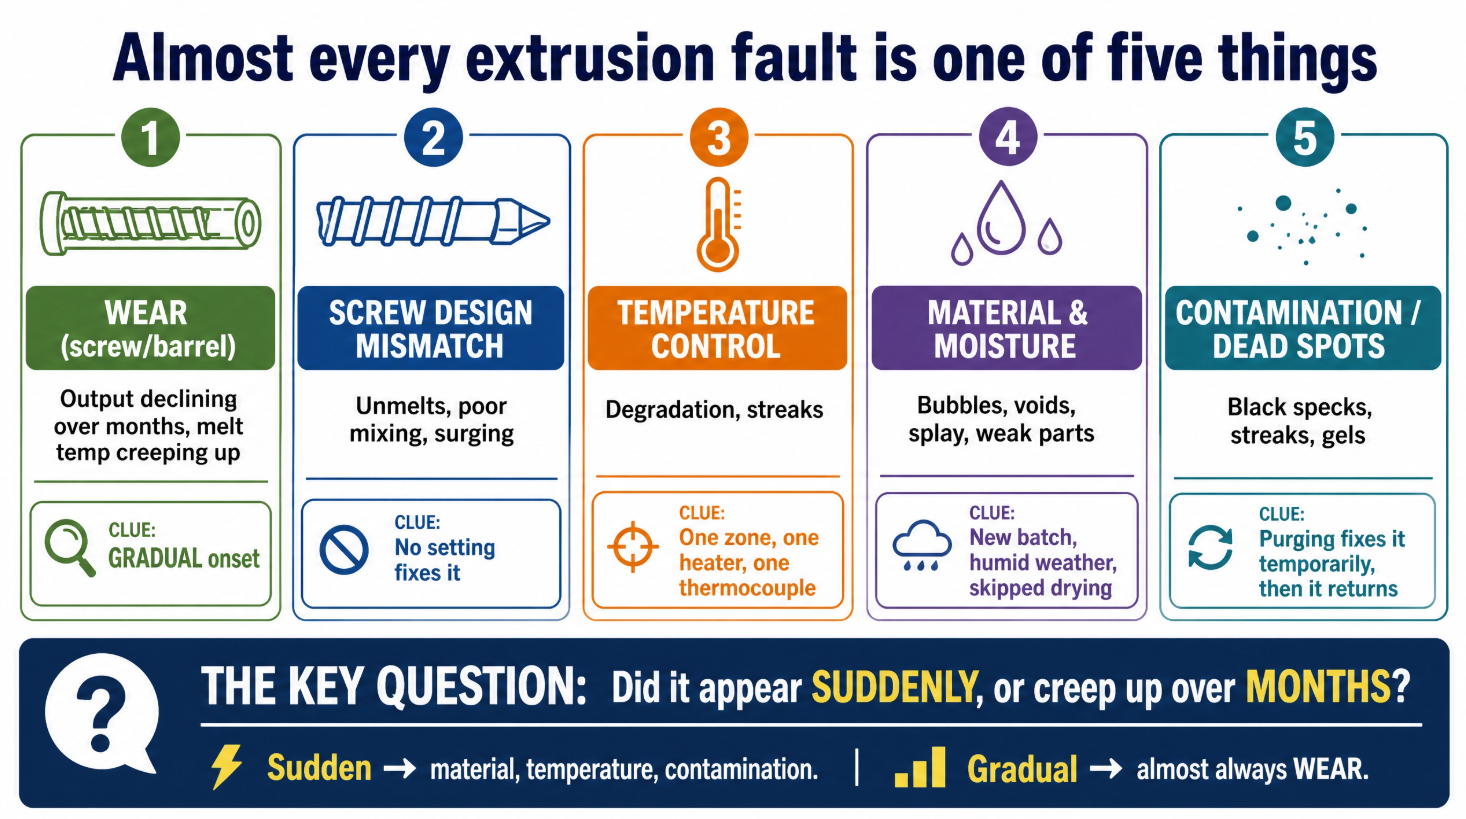
Before the symptom tables, it helps to know what you’re choosing between. Almost every extrusion fault is one of these:
| Category | What it looks like | The clue |
|---|---|---|
| Wear (screw/barrel) | Output slowly declining over months; melt temperature creeping up | Gradual onset — nothing changed, but it got worse |
| Screw design mismatch | Problem persists at every setting; unmelts, poor mixing, surging | No amount of operator adjustment fixes it |
| Temperature control | Degradation, streaks, unstable melt | Often traceable to one zone, one heater, or one thermocouple |
| Material & moisture | Bubbles, voids, splay, strength loss | Appears with a new batch, humid weather, or skipped drying |
| Contamination / dead spots | Black specks, streaks, gels appearing and returning | Cleared by purging, then comes back |
The single most useful diagnostic question: did this appear suddenly, or creep up over months? Sudden points to material, temperature, or contamination. Gradual almost always points to wear.
Output & Stability Problems
| Symptom | Most likely causes | Where to go |
|---|---|---|
| Output dropped gradually over months | Screw/barrel wear (clearance opened, melt leaks backward) — the classic | How much screw wear is acceptable · Wear limit calculator |
| Surging / pulsing output, unstable pressure | Screw design (feeding/melting instability); worn screw; feed problems | Screw design guide · check wear first |
| Can’t reach rated output; unmelts at higher speed | Screw is melting-limited — a general-purpose screw at its ceiling | Barrier screw vs general-purpose |
| Low output specifically on LLDPE film | Melting/design limits on that resin | LLDPE blown film low output |
| Melt temperature climbing over time | Wear (compensating with higher RPM) or excess shear from design | Wear analysis |
Degradation, Color & Contamination
| Symptom | Most likely causes | Where to go |
|---|---|---|
| Black specks in the product | Carbonized material breaking loose from dead spots, hot spots, or worn/pitted surfaces — usually manufactured inside your own machine | What causes black specks |
| PVC turning yellow | Early-stage degradation: heat/shear too high, stabilizer issue, stagnation | Why is my PVC turning yellow |
| Specks return after every purge | The carbon layer is bonded to the screw/barrel — purging removes only loose material | Black specks: the purge trap · Screw cleaning |
| POM/acetal smells of formaldehyde, degrades | Above ~230°C POM unzips back into formaldehyde; residence time; depleted stabilizer from regrind | Why POM degrades |
| Color streaks / uneven masterbatch | Insufficient distributive mixing | Choosing a mixing section |
| Pigment agglomerates / undispersed specks | Insufficient dispersive mixing | Choosing a mixing section |
Moisture & Material Problems
| Symptom | Most likely causes | Where to go |
|---|---|---|
| Bubbles, voids, splay, hissing at the die | Moisture — material not dried to target | Drying PET · Drying nylon |
| PET losing IV / strength | Hydrolysis from wet PET during melting (irreversible) | Why PET IV drops |
| Nylon parts weak / brittle | Hydrolytic chain scission from wet PA | Drying nylon |
| Bubbles persist even after correct drying | Volatiles generated in-process (recycled, WPC, printed reclaim) — you need venting | When you need a vented screw |
Film-Specific Problems
| Symptom | Most likely causes | Where to go |
|---|---|---|
| Gels / fish-eyes in film | Incomplete melting or degraded material — a melting and mixing problem | Eliminating gels and fish-eyes |
| Thickness bands around the bubble (TD) | Die gap, die heating, or air-ring asymmetry | Gauge variation in blown film |
| Thickness varying along the length (MD) | Output instability: surging, melt-temperature non-uniformity, worn screw | Gauge variation in blown film |
Wear & Mechanical Failure
| Symptom | Most likely causes | Where to go |
|---|---|---|
| Screw snapped / broke | Cold start (the #1 cause), foreign object, fatigue crack, or understrength steel | Why extruder screws break |
| Screw wearing out unusually fast | Abrasive filler (glass fiber) against inadequate surface treatment | Why glass fiber wears screws fast · Coating guide |
| Not sure if the screw or barrel is the worn one | Both wear — but the screw is designed to wear first | Does the screw or barrel wear first |
| New screw didn’t restore performance | The barrel is also worn — clearance is the sum of both | Barrel repair vs replacement |
| Screw stuck / can’t be removed | Degraded material seized in the barrel | Removing a broken screw |
The Diagnostic Sequence That Saves Time
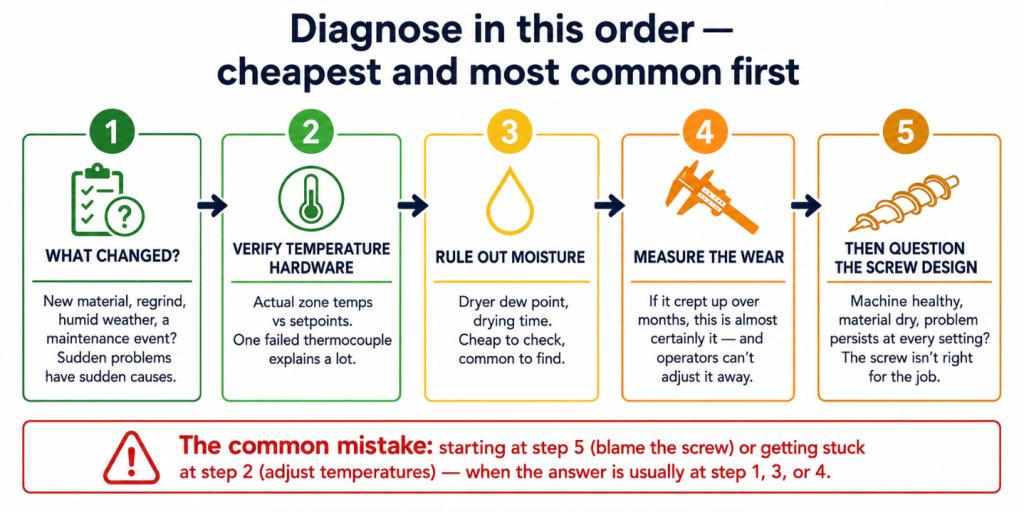
When the symptom could be several things, work in this order — cheapest and most common first:
- Check what changed. New material batch, new regrind, humid weather, a maintenance event? Sudden problems usually have a sudden cause.
- Verify the temperature hardware. Actual zone temperatures vs setpoints; one failed thermocouple or runaway heater band explains a surprising share of degradation and streaking.
- Rule out moisture. Dryer dew point, drying time, hopper condition. Cheap to check, common to find.
- Measure the wear. If the problem crept up over months, this is almost certainly it — and it’s the one thing operators can’t adjust away. Run your numbers through the wear limit calculator.
- Then question the screw design. If the machine is healthy, the material is dry, and the problem persists at every setting, the screw isn’t right for the job — see the screw design guide.
The reason this order matters: operators tend to start at step 5 (blame the screw) or spend weeks at step 2 (adjust temperatures), when the answer is usually at step 1, 3, or 4.
Most extrusion problems announce their own cause if you ask the right question first — did it appear suddenly or creep up, does it survive every setting change, does purging fix it temporarily — and the symptom tables above turn those answers into the specific cause and the specific fix, rather than another week of trial and error.
At BLOOM, we manufacture extruder screws and barrels, and we help customers work out whether a problem is wear, design, or something else entirely — including telling you when the answer isn’t a new screw. If you’re stuck on a persistent problem, send our engineering team your symptom, material, machine details, and any wear measurements on WhatsApp and we’ll help you diagnose it.
References and Further Reading
- Troubleshooting Screw and Barrel Wear in Extrusion, Plastics Technology — wear-driven output loss, clearance limits, and the diagnostic measurements behind them: https://www.ptonline.com/articles/troubleshooting-screw-and-barrel-wear-in-extrusion
- Stop Black Specks!, Plastics Technology — the two sources of contamination (bought-in vs manufactured in the machine) and where degradation starts: https://www.ptonline.com/articles/stop-black-specks