Are you struggling with declining output, inconsistent product quality, or inexplicably high energy bills on your extrusion line? The culprit might be hiding right inside your machine. The screw in a twin screw extruder is like the heart of the system. When it starts to fail, the entire operation suffers. Many manufacturers try to squeeze every last drop of life out of their screws to save on replacement costs, but this often leads to a false economy. The hidden costs of wasted energy, high scrap rates, and sluggish production quickly outweigh the price of a new screw. This guide will help you understand when it’s truly time to replace your extruder screw, moving beyond academic definitions to practical, shop-floor realities.
Why There Is No “One-Size-Fits-All” Lifespan
If you ask an expert, “How long does an extruder screw last?”, the honest answer is always, “It depends.” The lifespan of a screw is not a fixed number of hours; it’s a complex equation involving three main variables: the “temperament” of your material (abrasiveness and corrosiveness), the “skeleton” of your screw (metallurgy and surface treatment), and the “touch” of your operators (maintenance and processing conditions).
Think of it like a kitchen knife. If you only use it to slice soft vegetables, it will stay sharp for years. But if you use that same knife to chop through bone every day, it will dull very quickly. Similarly, processing pure, unfilled resins is gentle on a screw, while running highly filled, abrasive compounds is like running sandpaper through your machine.
Estimated Screw Lifespan by Material Type
To give you a practical baseline, here is a general guide to expected screw lifespans based on the type of material being processed. Keep in mind that these are estimates, and actual results will vary based on your specific operating conditions.
| Material Type | Estimated Lifespan (Hours) | Recommended Inspection Frequency |
| Standard Plastics (PP, PE, PS) | 20,000 – 30,000 | Every 6 months |
| Filled Compounds (e.g., 30% Glass Fiber) | 6,000 – 10,000 | Every 3 months |
| Highly Abrasive Fillers (Carbon Fiber, Ceramic) | < 2,000 | Monthly monitoring |
| Highly Corrosive Materials (Halogenated Flame Retardants) | 3,000 – 5,000 | Mandatory inspection during shutdowns |
6 Warning Signs Your Screw is Begging for Replacement
Don’t wait for a catastrophic failure. Your extruder will usually give you several warning signs that the screw is nearing the end of its useful life. Here are six critical indicators to watch for:
1. Shrinking Output
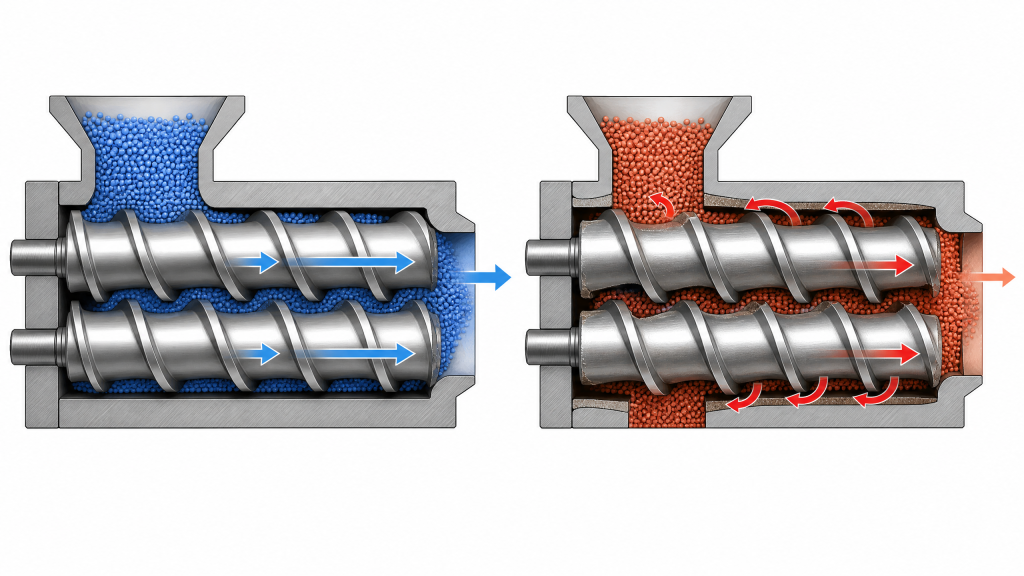
This is often the first and most obvious sign. If your extruder is running at the same RPM as always, but your output rate has noticeably dropped (e.g., from 1000 kg/hr to 800 kg/hr), your screw is losing its conveying efficiency. The material is slipping backward over the worn flights instead of being pushed forward.
2. Dancing Pressure Gauges
When a screw wears unevenly, its ability to melt and mix the polymer becomes inconsistent. This leads to erratic melt pressure at the die. If your pressure gauge is fluctuating wildly, it’s a strong indication that the screw geometry is compromised, which will inevitably lead to variations in product dimensions and surface finish.

3. Spiking Energy Bills
A worn screw has to work much harder to process the same amount of material. The motor draws more current to overcome the inefficiency caused by increased clearance and poor melting. If you notice a significant increase in your specific energy consumption (kWh/kg) without any changes to the formulation, a worn screw is a likely suspect.
4. Visual Wear and Tear
When you pull the screw for cleaning or maintenance, inspect it closely. Look for rounded flight edges, deep scoring, or pitting on the surface. If the screw looks like it has been chewed on, its performance is definitely suffering.
5. Feeding Issues and Surging
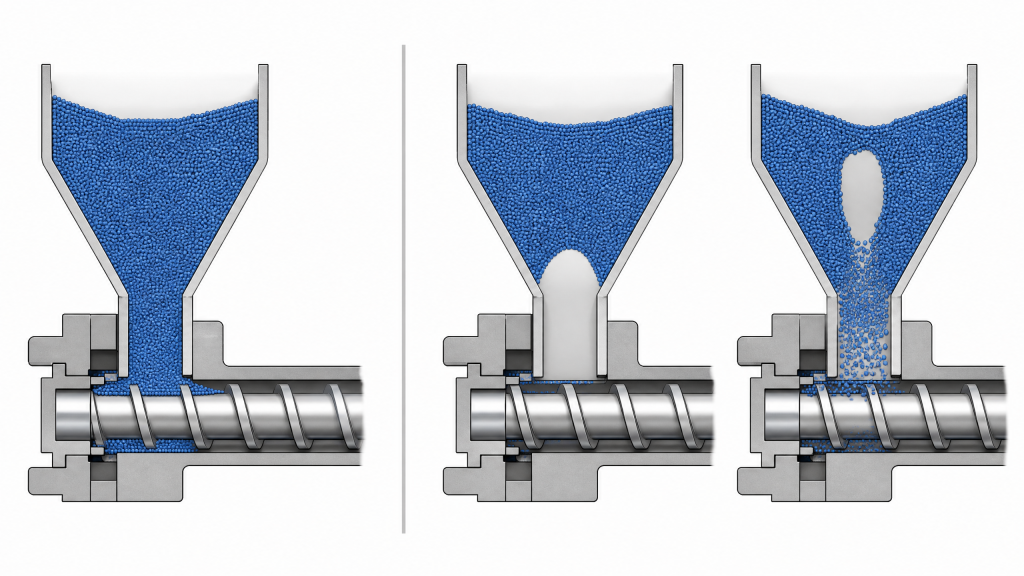
If material is bridging in the feed throat, or if the output is surging (coming out in bursts rather than a steady stream), the feed section of the screw might be severely worn. This prevents the screw from taking a consistent “bite” of the raw material.
6. A Spike in Scrap Rates
Ultimately, screw wear manifests in poor product quality. If you are suddenly seeing an increase in un-melted particles, black specks (degraded material hanging up in worn areas), poor color dispersion, or a drop in physical properties, and adjusting the process parameters doesn’t fix it, the screw is likely the root cause.
How to Give Your Screw a “Physical Exam”
The most definitive way to assess screw wear is to measure the clearance between the screw flights and the barrel wall. This is typically done using a feeler gauge.
Here are the general guidelines for interpreting the measurements:
•New Condition: The clearance is typically between 0.2mm and 0.3mm, depending on the machine size.
•Yellow Alert (Warning): When the clearance reaches around 0.5mm, you should start planning for a replacement or refurbishment. Performance is already degrading.
•Red Alert (Critical): If the clearance exceeds 1.0mm, you are losing money every hour you run the machine. The loss in efficiency and product quality far outweighs the cost of a new screw.
The Economics: Refurbish or Replace?
When faced with a worn screw, you have two main options: refurbish (rebuild the flights via welding) or buy a new one.
Refurbishing can be a cost-effective solution for minor wear, especially on larger, expensive screws. However, it’s not a magic bullet. If the screw shaft is bent, or if the wear is extremely deep, refurbishing is like putting a band-aid on a broken leg. The repaired screw may fail prematurely, causing even more downtime. For smaller screws or those with severe damage, purchasing a new, high-quality screw is often the more reliable and economical choice in the long run.
Conclusion: Proactive Maintenance is Your Best Cost-Saving Strategy
Don’t wait for a catastrophic failure to address screw wear. By understanding the warning signs, regularly monitoring key parameters, and performing timely inspections, you can proactively manage your twin screw extruder’s health. Establishing a “screw lifespan ledger” for different materials will help you anticipate replacement needs and budget accordingly. Remember, delaying a screw replacement might seem like saving money in the short term, but it invariably leads to higher operating costs, increased scrap rates, and reduced overall profitability. Being proactive is the smartest way to keep your extrusion line running smoothly and profitably.
FAQ (Frequently Asked Questions)
Q: Can I just weld and repair a broken screw?
A: Minor surface wear can often be repaired. However, if the screw is broken, severely bent, or has deep structural damage, welding might compromise its integrity and lead to premature failure. It’s crucial to consult with a screw manufacturer or expert.
Q: Why is my output still low after replacing the screw?
A: If output remains low, check other components like the barrel (which also wears), die, or processing parameters. Ensure the new screw is correctly installed and aligned, and that your material feeding system is functioning optimally.
Q: How often should I visually inspect my screws?
A: For highly abrasive or corrosive materials, a visual inspection during planned shutdowns (e.g., monthly or quarterly) is recommended. For less demanding materials, annual inspections might suffice, but always monitor process parameters closely.