Anyone who has spent time in a plastics compounding plant knows that the biggest threat to an extruder isn’t a mechanical breakdown—it’s contamination.
If you just finished a run of black flame-retardant ABS and need to switch to clear PC, failing to thoroughly clean a twin-screw extruder will result in carbonized residues (black specks) and color streaking that can turn tons of your next batch into worthless scrap. “Purging” a machine isn’t just a maintenance chore; it’s the frontline of quality control.
Let’s skip the textbook theories and talk about the four most common cleaning methods actually used on the shop floor, along with the hard-learned lessons that veteran operators rarely share.
1. Purging Compounds: The Everyday Workhorse
This is the standard, “lazy” method for quick color or material changeovers—but that doesn’t mean it’s foolproof. Many operators try to save money by just pushing the next batch of production resin through the barrel, only to end up wasting half a ton of material that still comes out with color streaks.
- The Shop-Floor Reality: Standard commodity resins (like bare PE or PP) have low viscosity. They simply don’t have the “scrubbing power” to drag out stubborn colorants hiding in the dead zones of the screw.
- The Veteran’s Advice: * Don’t cheap out on commercial Purging Compounds. Good commercial purges contain active chemical agents and mild abrasives. It’s the difference between trying to wash a greasy pan with plain water versus using dish soap and a sponge.
- “Pulse” the RPMs. Don’t just run the extruder at a constant speed. Try surging the screw speed (for example, fluctuating between 15 RPM and 60 RPM). This pulsing action creates pressure spikes that literally shock the carbon buildup off the barrel walls.
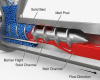
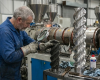
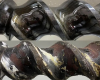
2. Pulling the Screws: The Deep Way to Clean a Twin-Screw Extruder
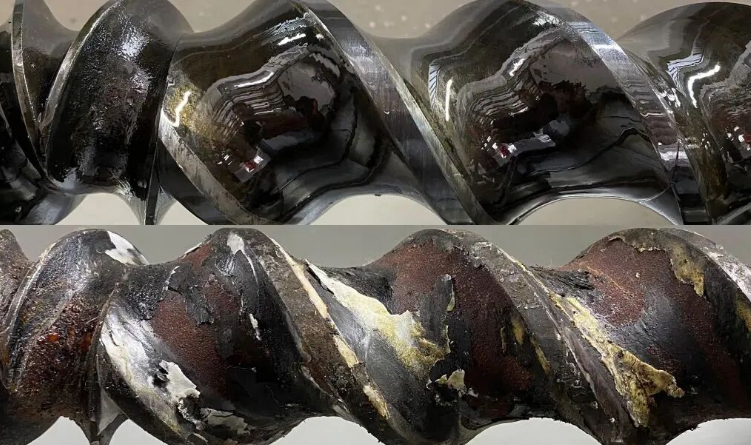
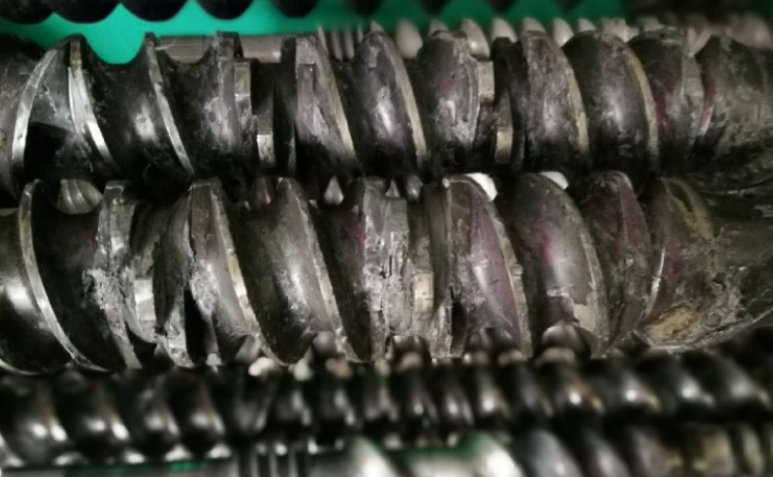
When purging compounds fail, or when you are dealing with severe polymer degradation and carbon buildup, you have to physically pull the screws out of the barrel. This is where the real work begins.
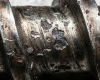
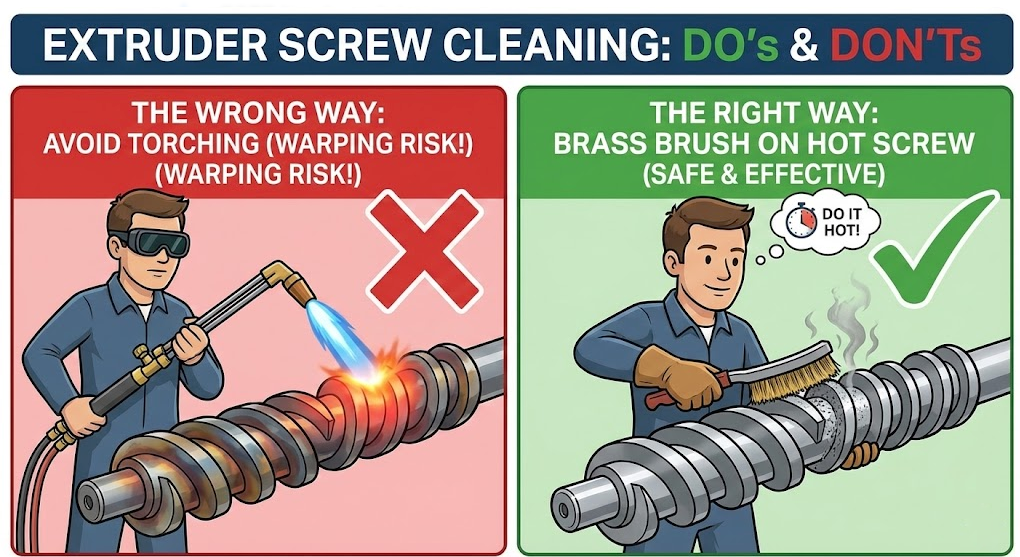
- The Golden Rule: Do it hot! * The moment the screws are pulled, you must immediately clean them while the polymer is still in a melt state. Use brass brushes and brass scrapers exclusively. Never let an operator near a screw with a steel wire brush or an iron putty knife. Once you scratch the nitrided surface of the screw, you create a permanent micro-crater where degraded plastic will hide and burn forever.
- The Reassembly Trap: * Cleaning the screw is only half the battle; putting it back together is where rookies make expensive mistakes. If the modular screw elements are put back in the wrong order, or if the operator fails to align the splines and the phase angle of the twin screws correctly, turning on the motor will instantly snap the screw shaft or chew up the barrel lining. Always take photos before disassembling.
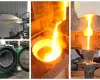
3. The Torching / Burn-Off Method: The Old-School Danger Zone
In many older plants, the moment an operator sees hardened plastic stuck to a screw flight, they grab an acetylene torch and start blasting it. Stop them immediately.
- Why is it dangerous? * Extruder screws are typically machined from high-grade alloys (like 4140 steel or 38CrMoAlA). They aren’t afraid of fire, but they are terrified of localized overheating. An acetylene torch burns at up to 3000°C (5400°F). This easily causes localized annealing (softening the metal) or severe warping. A warped twin-screw is essentially a meat grinder—it will destroy your barrel wall as soon as it rotates.
- If you absolutely must use heat:
- Strictly ban acetylene. Only use a cooler propane torch, and keep the flame moving constantly. Never focus on one spot.
- If you see the steel turn a “bluish” tint, the damage is already done. The surface hardness is ruined in that spot.
4. High-Pressure Water Washing: The Expensive “Black Magic”
In recent years, high-end compounding facilities have started using automated hydro-cleaning machines to clean twin-screw extruder elements. The principle is simple: use high-kinetic water jets to blast the plastic off the metal.
- The Advantages:
- 100% Non-Destructive: There is zero risk of heat warping (like torching) and zero risk of metal scratching (like manual scraping).
- Reaches the Dead Zones: The water jets can easily penetrate the tight gaps inside kneading blocks—areas that are notoriously difficult to clean by hand.
- The Limitations: * These machines require a hefty capital investment. Also, if you have polymer that has completely carbonized into rock-hard “dead spots,” the water pressure alone might not be enough to break it free without pre-softening.
The Bottom Line on the Factory Floor
There is no “one size fits all” cleaning method.
- If you are doing a standard changeover (e.g., going from a light color to a dark color), using a commercial purging compound is the most economical choice. It keeps the machine running and minimizes downtime.
- If you are transitioning from dark to light, or moving away from a highly heat-sensitive material (like PVC), taking the time to pull the screws for a manual deep clean is the only way to guarantee your next batch won’t be contaminated.
- As for torching, avoid it unless absolutely necessary. A precision twin-screw shaft can cost tens of thousands of dollars. Risking a warped screw just to save 30 minutes of manual scraping is terrible math.
Whether you clean your twin-screw extruder with purging compounds or manual teardowns, remember that the quality of your purge directly dictates the yield of your next production run. Spending an extra hour doing a proper teardown is always cheaper than throwing away a ton of resin filled with black specks.
Frequently Asked Questions (FAQ) About Cleaning Twin-Screw Extruders
Q: How often should I physically pull the screws on a twin-screw extruder?
A: There is no universal timetable; it depends entirely on what you are running. For continuous, single-material production, pulling the screws every 3 to 6 months for a preventative maintenance inspection is standard. However, if you frequently switch between wildly different polymers, run heat-sensitive materials (like PVC or POM), or start noticing unexplained black specks in your melt, you need to pull them immediately for a deep clean and visual inspection.
Q: Can I just use my standard production resin to purge my twin-screw extruder?
A: Technically yes, but it is terrible math. Standard commodity resins lack the chemical active agents and mechanical “scrubbing” power needed to clean out the tight clearances of kneading blocks and mixing elements. You will likely waste hundreds of pounds of good production resin and hours of machine time to achieve what a few pounds of a dedicated commercial purging compound could do in 15 minutes.
Q: What is the safest way to remove rock-hard carbonized plastic (black specks) from a screw?
A: If high-abrasion purging compounds fail, a manual teardown is required. Pull the screws and aggressively scrub the flights with brass brushes while the polymer is still hot. If the carbon is completely baked onto the metal like stone, the safest modern methods are high-pressure hydro-cleaning or placing the screw in a specialized, temperature-controlled fluidized sand bath (burn-off oven). Never use a high-heat acetylene torch or steel tools, as they will permanently warp or scratch the screw.
Q: Why am I still getting black specks immediately after a thorough screw cleaning?
A: If your screws are perfectly clean but you still have contamination, the problem is likely hiding elsewhere. Check your die head, screen changer, and the inner walls of the barrel. Polymer often degrades and hides in the small gaps around breaker plates or sensor ports. A clean screw inside a dirty barrel will still produce scrap.